1. Export a CSV marker file from Pix
Open the comments panel on the right side in Pix. Press the three dots and select "Export". Now you can then download the CSV file from Pix.
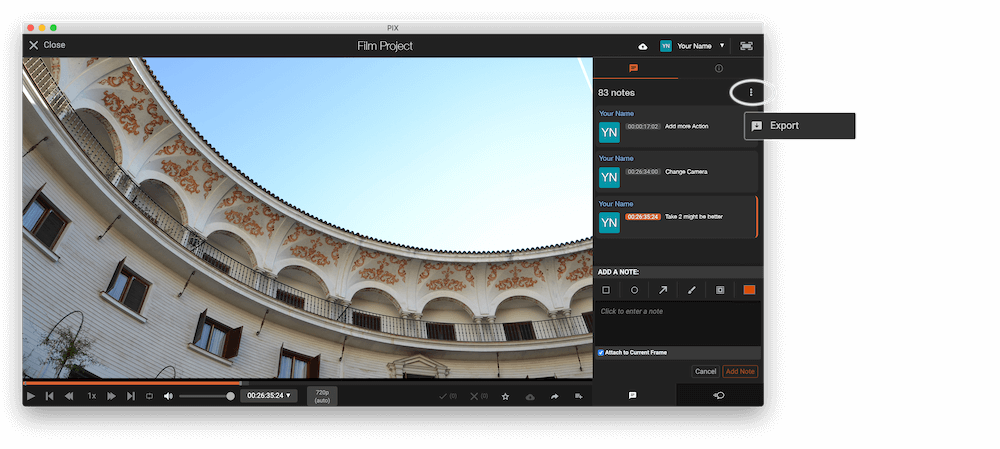
The timecode in Pix starts with 00:00:00:00 for each clip, so you may need to use the offset function on EditingTools.io to sync it with you timeline or move it manually in your NLE (editing software).
2. Use the "Marker Konverter" to convert the CSV marker file into an EDL marker file
Open the free Marker Konverter, select "Pix Systems > Comments (.csv)" and set "convert" to "DaVinci Resolve > Sequence (.edl)". Generate and download the file. Wenn du Probleme beim Konvertieren der Datei hast, kannst du dich an den kostenlosen Support wenden.
3. Import the EDL marker file in DaVinci Resolve
- Create the new sequence or open the sequence in your project.
- Right-click the Sequence in your Media tab. It will open the popup menu.
- Navigate to: "Timelines > Import > Timeline Markers from EDL".
- Select the EDL marker file for Resolve and the markers will load.
If you don't see any markers, make sure they are in the correct timecode range and try zooming out of your timeline. If you cannot find the Timeline Markers, make sure you have selected a sequence in your Media tab. Resolve might not support special characters in marker names and comments.
🚀 Fertig
Das war's fürs Erste! Wenn du dieses Tutorial hilfreich fandest, teile es bitte, um uns zu unterstützen. Wenn du Vorschläge hast, wie wir den Workflow verbessern könnten, lass es uns wissen!